
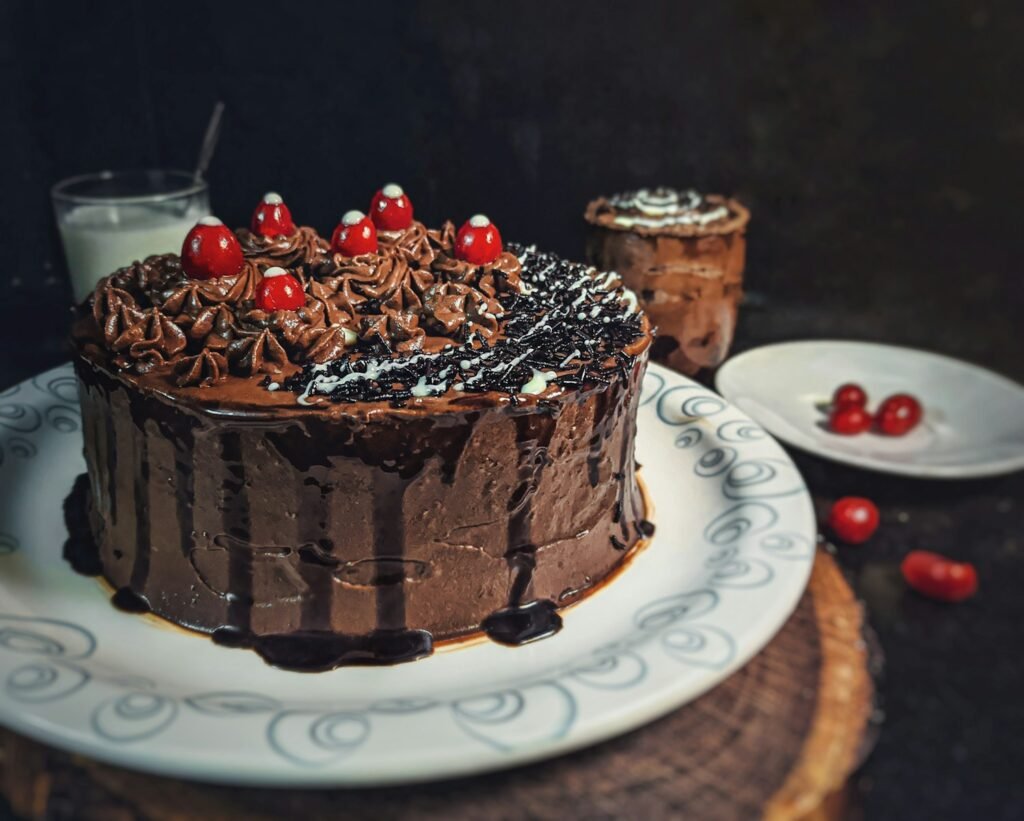
Few desserts manage to feel both elegant and comforting at the same time quite like Black Forest cake. With its layers of dark chocolate sponge, whipped cream, tart cherries, and a generous scattering of chocolate shavings on top, it’s the kind of cake that looks like it belongs in a bakery window, yet is entirely achievable in a home kitchen with a little patience and the right technique.
Originally hailing from Germany, where it’s known as Schwarzwälder Kirschtorte, Black Forest cake has become a beloved classic around the world, showing up at birthdays, anniversaries, and holiday tables alike. What makes it so enduringly popular is the way it balances rich, slightly bitter chocolate against the bright tartness of cherries and the lightness of whipped cream — nothing about it feels overly heavy, despite how indulgent it looks.
This recipe walks through every component from scratch: a moist chocolate sponge, a cherry filling with just the right amount of tang, and a stabilized whipped cream that holds its shape beautifully. It takes a bit more effort than your average layer cake, but the result is absolutely worth it.
What Makes a Great Black Forest Cake
Before diving into the recipe, it helps to understand the handful of details that separate a truly great Black Forest cake from an average one:
- A properly moist chocolate sponge. Because this cake relies on rich, dark chocolate flavor rather than sweetness alone, the sponge needs to be moist enough to stand on its own, even before the syrup and filling are added.
- A soaking syrup, often with kirsch. Traditional versions use kirschwasser, a clear cherry brandy, brushed onto the sponge layers to keep them moist and add a subtle boozy depth. This recipe includes a non-alcoholic alternative for anyone who prefers to skip it.
- Real cherries, not just canned pie filling. While canned cherries work well as a shortcut, the best versions use a filling that balances sweetness and tartness rather than tasting purely like cherry syrup.
- Stabilized whipped cream. Plain whipped cream tends to deflate and weep over time, especially once refrigerated. A small amount of stabilizer keeps the frosting looking clean and holding its shape for hours.
Ingredients You’ll Need
This recipe makes one 8-inch, three-layer cake, serving about 10 to 12 people.
For the chocolate sponge:
- 1 ¾ cups all-purpose flour
- ¾ cup unsweetened cocoa powder
- 1 ½ teaspoons baking powder
- 1 ½ teaspoons baking soda
- ½ teaspoon salt
- 2 cups granulated sugar
- 2 large eggs, room temperature
- 1 cup buttermilk, room temperature
- ½ cup vegetable oil
- 2 teaspoons vanilla extract
- 1 cup hot water or hot coffee
For the cherry filling:
- 2 cans (14 ounces each) pitted dark sweet cherries, drained, juice reserved
- ¼ cup granulated sugar
- 2 tablespoons cornstarch
- 1 tablespoon lemon juice
- 2 tablespoons kirsch (optional)
For the soaking syrup:
- ½ cup reserved cherry juice
- 2 tablespoons kirsch, or 1 teaspoon vanilla extract for a non-alcoholic version
For the stabilized whipped cream:
- 2 ½ cups heavy whipping cream, cold
- ½ cup powdered sugar
- 1 teaspoon vanilla extract
- 1 tablespoon unflavored gelatin
- 3 tablespoons cold water
For garnish:
- Chocolate shavings or chocolate curls
- Fresh or maraschino cherries
- Extra whipped cream, for piping
Step-by-Step Instructions
Step 1: Prepare the Chocolate Sponge
Preheat your oven to 350°F (175°C). Grease three 8-inch round cake pans and line the bottoms with parchment paper.
In a large bowl, whisk together the flour, cocoa powder, baking powder, baking soda, and salt. In a separate bowl, whisk the sugar, eggs, buttermilk, oil, and vanilla extract until smooth and well combined.
Pour the wet ingredients into the dry ingredients and mix until just combined. The batter will be quite thick at this stage. Slowly stir in the hot water or hot coffee — the batter will loosen significantly and become thin, almost like a liquid. This is completely normal and is actually the secret to an incredibly moist chocolate sponge, since the hot liquid helps bloom the cocoa powder and keeps the crumb tender.
Divide the batter evenly among the three prepared pans. Bake for 20 to 25 minutes, or until a toothpick inserted into the center comes out clean. Let the cakes cool in their pans for about 10 minutes, then transfer them to a wire rack to cool completely before assembling, since warm layers will melt the whipped cream and cause the whole cake to slide apart.
Step 2: Make the Cherry Filling
While the cakes cool, prepare the filling. In a saucepan, combine the reserved cherry juice, sugar, and cornstarch, whisking until the cornstarch is fully dissolved with no lumps. Place over medium heat and cook, stirring constantly, until the mixture thickens into a glossy, syrupy consistency, about 3 to 5 minutes.
Remove from heat and stir in the lemon juice and kirsch, if using. Gently fold in the drained cherries, coating them evenly in the thickened syrup. Set aside to cool completely to room temperature before using, since warm filling will melt the whipped cream layers during assembly.
Step 3: Prepare the Soaking Syrup
In a small bowl, combine the reserved cherry juice with kirsch or vanilla extract. This syrup will be brushed onto each sponge layer before adding the filling and cream, helping keep the cake moist and adding an extra layer of cherry flavor throughout.
Step 4: Make the Stabilized Whipped Cream
In a small bowl, sprinkle the gelatin over the cold water and let it sit for about 5 minutes to bloom. Microwave it in short 5-second bursts, stirring in between, until fully dissolved into a clear liquid. Let it cool slightly so it’s no longer hot, but still liquid.
In a large mixing bowl, beat the cold heavy cream, powdered sugar, and vanilla extract on medium speed until soft peaks begin to form. With the mixer running on low, slowly drizzle in the cooled gelatin mixture, then increase the speed back to medium-high and beat until firm, stable peaks form. Be careful not to overbeat, or the cream will start to look grainy and separated.
This stabilized cream will hold its shape far longer than plain whipped cream, making it much easier to work with during assembly and keeping the finished cake looking clean for hours, even after refrigeration.
Step 5: Assemble the Cake
Place one chocolate sponge layer on your serving plate or cake stand. Brush generously with the soaking syrup, letting it soak in for a moment. Spread a layer of whipped cream evenly over the top, leaving a small border around the edge. Spoon about a third of the cherry filling over the cream, keeping it within the border so it doesn’t squeeze out when the next layer is added.
Place the second sponge layer on top, pressing down gently. Repeat the process: brush with syrup, spread whipped cream, add cherry filling. Top with the final sponge layer, brushing it with the remaining syrup as well.
Cover the entire cake, top and sides, with a thin crumb coat of whipped cream to seal in any loose crumbs. Refrigerate for about 15 to 20 minutes to firm up, then apply a final, thicker layer of whipped cream over the entire cake, smoothing the sides and top as neatly as possible.
Step 6: Decorate
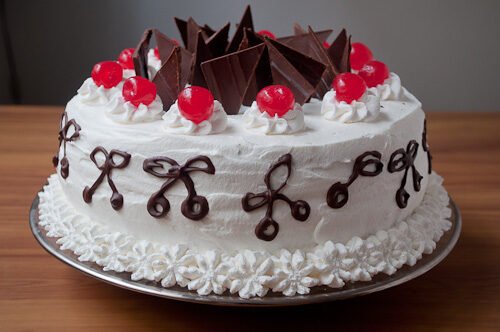
Pipe decorative swirls of whipped cream around the top edge of the cake using a piping bag fitted with a star tip. Generously scatter chocolate shavings or curls over the top and press some gently onto the sides as well. Finish with fresh or maraschino cherries arranged around the piped cream swirls for that classic, unmistakable Black Forest look.
Refrigerate the finished cake for at least an hour before serving, allowing the layers to set fully and the flavors to meld together.
Tips for Success
- Make sure your cake layers are completely cool before assembling. Even slightly warm layers will cause the whipped cream to soften and slide.
- Don’t skip the soaking syrup. It’s a small step, but it makes a real difference in keeping the sponge moist, especially since chocolate cake can dry out faster than vanilla varieties.
- Use cold equipment for whipping cream. Chilling your mixing bowl and whisk attachment beforehand helps the cream whip up faster and hold its structure better.
- Level your cake layers if needed. If your sponges domed slightly during baking, trim the tops flat with a serrated knife before assembling for cleaner, more even layers.
- Work with well-drained cherries. Excess liquid in the cherry filling can make the layers slide or the cream weep, so make sure the filling has thickened properly and cooled before use.
Storage
Because of the whipped cream and cherry filling, Black Forest cake needs to be stored in the refrigerator rather than at room temperature. Covered loosely, it will keep well for up to 3 days. For the best texture, let it sit at room temperature for about 15 to 20 minutes before serving, allowing the cream to soften slightly.
If you’d like to prepare components ahead of time, the sponge layers can be baked a day in advance and stored, tightly wrapped, at room temperature, while the cherry filling can also be made a day ahead and refrigerated until you’re ready to assemble.
Final Thoughts
Black Forest cake earns its status as a classic for good reason — it’s rich without being cloying, elegant without being fussy, and endlessly satisfying with that combination of dark chocolate, tart cherries, and light whipped cream. While it does take a bit more time than a simple one-bowl cake, most of the steps can be broken up across a day or two, making it far more manageable than it might first appear.
Whether you’re making it for a special celebration or simply because you’re craving something a little more indulgent than usual, this cake has a way of impressing everyone at the table while still feeling like a labor of love rather than an intimidating project.
Enjoy every rich, cherry-studded slice.