
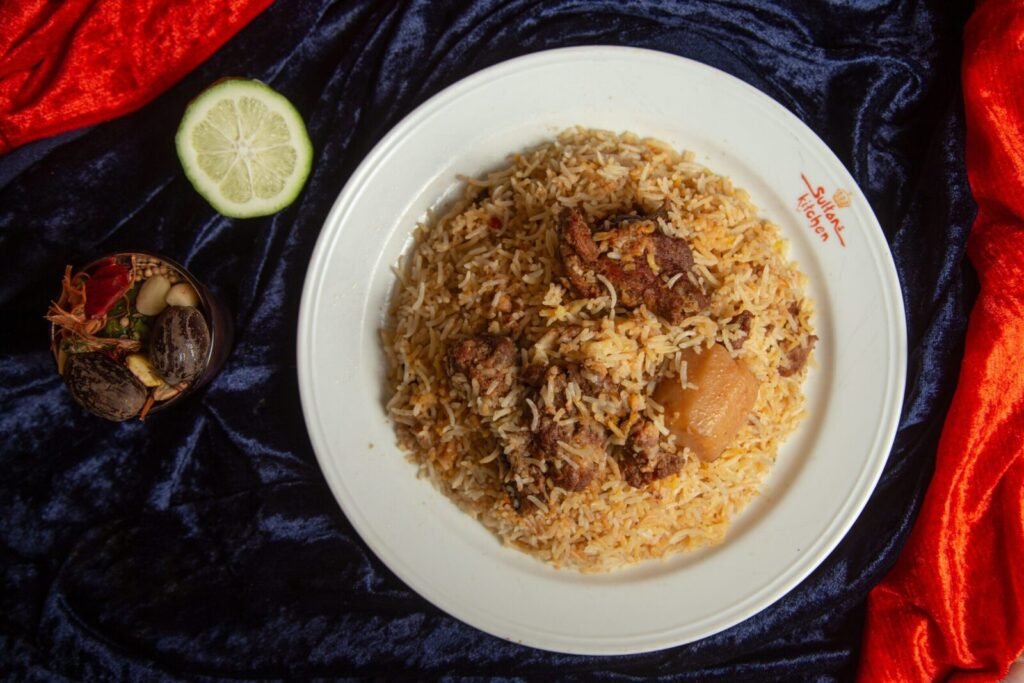
Few dishes command as much respect and love across South Asian kitchens as Sindhi biryani. Originating from the Sindh region of Pakistan, this biryani is known for being noticeably bolder, spicier, and more tangy than many other regional biryani variations. It’s a dish built on contrast — fragrant, long-grain basmati rice layered with tender, deeply spiced chicken, punctuated by tart notes from potatoes, plums, and yogurt, and finished with fried onions and fresh herbs that tie the whole dish together.
Sindhi biryani isn’t a quiet, subtle dish. It’s meant to be vibrant, aromatic, and generously spiced, making it a favorite at weddings, celebrations, and Sunday family lunches. While it might look like a project reserved for experienced cooks, understanding the layering technique and spice balance makes it entirely achievable at home, even for those who haven’t made biryani before.
In this article, we’ll walk through everything you need to know to make an authentic chicken Sindhi biryani: the key ingredients that define its distinct flavor, the science behind properly layered biryani, a detailed step-by-step method, tips for getting perfectly fluffy rice and tender chicken, common mistakes to avoid, and serving suggestions to complete the meal.
What Makes Sindhi Biryani Different?
While there are many regional variations of biryani across South Asia, Sindhi biryani stands out for a few distinct characteristics. First, it tends to use a generous amount of whole spices and a noticeably tangier flavor profile, often achieved through the addition of yogurt, tomatoes, and sometimes dried plums (aloo bukhara) or tamarind.
The overall effect is a biryani that’s more assertive and complex than milder versions, with a beautiful balance of heat, tang, and aromatic warmth from spices like star anise, black cardamom, and shahi jeera (caraway seeds), which are less commonly used in other biryani styles.
What You’ll Need
This recipe serves about 6 people generously.
For the Chicken Marinade:
- 1 kg (about 2.2 lbs) chicken, bone-in pieces preferred for maximum flavor
- 1 cup plain yogurt
- 2 tablespoons ginger-garlic paste
- 1 teaspoon red chili powder
- 1/2 teaspoon turmeric powder
- 1 teaspoon salt
- Juice of 1 lemon
For the Chicken Masala (Base Gravy):
- 1/2 cup cooking oil or ghee
- 2 large onions, thinly sliced
- 2 medium tomatoes, chopped
- 2 to 3 green chilies, slit lengthwise
- 1 tablespoon coriander powder
- 1 teaspoon cumin powder
- 1 teaspoon garam masala
- 1/2 teaspoon red chili powder (adjust to taste)
- Salt, to taste
- 4 to 5 dried plums (aloo bukhara), optional but traditional
- 1/2 cup fresh coriander leaves, chopped
- 1/2 cup fresh mint leaves, chopped
- 2 medium potatoes, peeled and quartered, fried until golden
Whole Spices for the Masala:
- 2 black cardamom pods
- 4 green cardamom pods
- 1 star anise
- 1 cinnamon stick
- 4 to 5 cloves
- 1 teaspoon shahi jeera (caraway seeds) or cumin seeds
- 2 bay leaves
For the Rice:
- 3 cups basmati rice, soaked for 30 minutes and drained
- Water, for boiling
- Salt, to taste
- 2 to 3 whole black cardamom pods
- 1 cinnamon stick
- 2 bay leaves
For Layering and Garnish:
- A pinch of saffron strands soaked in 2 tablespoons warm milk, or a few drops of yellow food coloring dissolved in water
- 1 cup fried onions (store-bought or homemade)
- Extra fresh coriander and mint leaves
- 2 tablespoons ghee, for drizzling
Understanding the Layering Technique
Biryani, at its core, relies on a technique called “dum” cooking, where partially cooked rice and a fully cooked meat masala are layered together in a heavy-bottomed pot, then sealed and cooked over low heat. This allows the rice to finish cooking gently while absorbing the aromas and flavors of the masala beneath it, without the two components turning into a mushy, homogenous mixture.
The key to successful layering is timing: the rice should be parboiled to about 70 to 80 percent doneness before layering, since it will continue cooking during the dum process. The chicken masala, meanwhile, needs to be fully cooked and well-reduced before layering, since it won’t cook further during this stage — it simply needs time to release its aroma into the rice through the steam trapped in the sealed pot.
Step-by-Step Instructions
Step 1: Marinate the Chicken
In a large bowl, combine the chicken pieces with yogurt, ginger-garlic paste, red chili powder, turmeric, salt, and lemon juice. Mix well, ensuring every piece is well coated. Cover and let it marinate for at least 1 hour at room temperature, or up to overnight in the refrigerator for deeper flavor.
Step 2: Fry the Potatoes
Peel and quarter the potatoes, then shallow fry them in oil until golden brown on the outside. Remove and set aside; they’ll be layered into the biryani later, adding a soft, flavorful bite to the finished dish.
Step 3: Prepare the Chicken Masala Base
Heat the oil or ghee in a large, heavy-bottomed pot over medium heat. Add the whole spices — black cardamom, green cardamom, star anise, cinnamon stick, cloves, shahi jeera, and bay leaves — and let them sizzle for about 30 seconds until fragrant.
Add the sliced onions and fry until golden brown, stirring frequently to prevent burning. This step takes patience, usually around 10 to 12 minutes, but properly caramelized onions are essential to the depth of flavor in the final dish.
Step 4: Cook the Masala
Add the chopped tomatoes and green chilies to the pot, cooking until the tomatoes soften and break down. Stir in the coriander powder, cumin powder, garam masala, and red chili powder, cooking for another minute to toast the spices.
Step 5: Add the Chicken
Add the marinated chicken to the pot along with all of its marinade. Stir well to combine with the masala, then cover and cook over medium-low heat for about 20 to 25 minutes, stirring occasionally, until the chicken is tender and the masala has thickened and released oil at the edges — a classic sign that the masala is properly cooked.
Step 6: Add Final Flavor Elements
Stir in the dried plums, fried potatoes, half of the chopped coriander and mint leaves. Cook for another 5 minutes to let the flavors meld together, then taste and adjust the salt and spice levels as needed. Remove from heat.
Step 7: Parboil the Rice
In a large pot, bring water to a boil with salt, black cardamom, cinnamon stick, and bay leaves. Add the soaked and drained basmati rice, and cook until the rice is about 70 to 80 percent done — it should still have a slight bite at the center. This usually takes about 6 to 7 minutes, but timing varies depending on your rice, so check frequently. Drain the rice immediately once ready to prevent overcooking.
Step 8: Layer the Biryani
In the same heavy-bottomed pot used for the chicken masala (or a fresh large pot), spread a layer of the chicken masala evenly across the bottom. Top with a layer of the parboiled rice, spreading it evenly but gently to avoid crushing the grains.
Repeat this layering process, alternating between chicken masala and rice, finishing with a final layer of rice on top.
Step 9: Add Finishing Touches
Drizzle the saffron milk (or yellow food coloring, if using) evenly over the top layer of rice for that classic biryani color contrast. Scatter the remaining fried onions and fresh coriander and mint leaves on top. Drizzle the ghee over everything for added richness and aroma.
Step 10: Cook on Dum
Cover the pot tightly with a lid, sealing the edges with dough or foil if needed to trap the steam completely. Place the pot over very low heat and cook for 20 to 25 minutes. This gentle steaming process, known as “dum,” allows the rice to finish cooking while absorbing the aroma and flavor of the masala beneath it.
Step 11: Rest Before Serving
Once the dum cooking time is complete, turn off the heat and let the biryani rest, still covered, for another 10 minutes before opening the lid. This resting period allows the layers to settle and makes it easier to serve without breaking apart the rice grains.
Step 12: Fluff and Serve
Gently fluff the biryani with a fork, mixing the layers slightly from top to bottom to distribute the rice and chicken masala evenly, while being careful not to mash the rice grains.
Tips for the Best Sindhi Biryani
Don’t skip the marination time. Longer marination results in more tender, flavorful chicken throughout the dish.
Fry your onions properly. Well-caramelized onions are one of the biggest flavor contributors in biryani, so don’t rush this step.
Parboil the rice carefully. Undercooking too much leaves the rice raw at the center even after dum cooking, while overcooking leads to mushy, broken grains.
Seal the pot well during dum cooking. This traps the steam necessary for the rice to finish cooking properly and absorb the aromatic flavors from below.
Let it rest before serving. This short resting period makes a noticeable difference in how neatly the biryani serves.
Common Mistakes to Avoid
- Undercooking or overcooking the chicken masala before layering. The masala needs to be fully cooked and flavorful before it goes into the pot, since it won’t cook further during dum.
- Using rice that’s too fully cooked before layering. This leads to mushy, overcooked rice by the time the dum process finishes.
- Not sealing the pot properly. Escaping steam prevents the rice from finishing evenly and absorbing the flavors from below.
- Skipping the resting period. Serving immediately after removing the lid often results in a messier, less structured presentation.
- Under-seasoning the masala. Since the rice absorbs flavor from the masala below, an under-seasoned base will result in a bland biryani overall, even if the rice itself was well cooked.
Serving Suggestions
Chicken Sindhi biryani is traditionally served with raita (a cooling yogurt-based side dish), sliced cucumbers and tomatoes, and a wedge of lemon for an extra squeeze of acidity. A side of chutney, whether tamarind or mint-coriander, also complements the biryani’s bold flavors well.
Storage Tips
Leftover biryani can be stored in an airtight container in the refrigerator for up to 3 days. Reheat gently on the stovetop with a splash of water, or in the microwave covered with a damp paper towel, to help restore moisture and prevent the rice from drying out.
Biryani also freezes well for up to a month. Thaw overnight in the refrigerator before reheating for the best texture.
Final Thoughts
Chicken Sindhi biryani is a dish that rewards attention to technique — properly caramelized onions, a well-cooked and flavorful masala base, carefully parboiled rice, and a well-sealed dum cooking process all come together to create a biryani that’s bold, aromatic, and deeply satisfying. Once you understand these core steps, you’ll find that making an authentic Sindhi biryani at home is entirely achievable, even if it takes a bit of practice to perfect the timing.
Whether you’re cooking for a special occasion or simply craving the vibrant, spicy comfort of a well-made biryani, this recipe gives you everything you need to bring that beloved Sindhi flavor to your own table.
So marinate your chicken, fry those onions until golden, and get ready to layer up a pot of biryani that captures everything wonderful about this iconic dish.