
There’s something magical about pan pizza. It’s not the thin, cracker-crisp pizza you get from a wood-fired oven, and it’s not the foldable New York slice either. Pan pizza sits in its own delicious category — thick, golden, and crispy on the bottom, with a soft, airy crumb inside and a cheesy crust that rivals anything you’d order from a chain restaurant. The best part? You can make it at home with nothing more than a cast iron skillet or a basic cake pan.
In this article, we’ll walk through everything you need to know to make restaurant-quality pan pizza in your own kitchen: the dough, the sauce, the toppings, and the little techniques that make all the difference between an average pizza and an unforgettable one.
Why Pan Pizza Deserves a Spot in Your Kitchen
Pan pizza gets its signature texture from one simple trick — a generous amount of oil coating the pan before the dough goes in. As the pizza bakes, that oil essentially fries the bottom crust, creating a deep golden, almost lacy crust that’s crunchy on the outside and soft on the inside. It’s the textural contrast that makes pan pizza so addictive.
Unlike Neapolitan-style pizza, which demands blistering hot ovens and quick cook times, pan pizza is forgiving. It doesn’t require a pizza stone, a wood-fired oven, or any specialized equipment. A regular home oven and a cast iron skillet (or even a metal cake pan) will get you there. This makes it one of the most approachable homemade pizza styles for beginners, while still delivering serious flavor.
Ingredients You’ll Need
For the Dough
- 3 cups (about 380g) all-purpose or bread flour
- 1 packet (2¼ teaspoons) instant or active dry yeast
- 1½ teaspoons sugar
- 1½ teaspoons salt
- 1¼ cups warm water (about 110°F)
- 2 tablespoons olive oil (plus extra for the pan)
For the Sauce
- 1 can (14 oz) crushed tomatoes
- 2 cloves garlic, minced
- 1 tablespoon olive oil
- 1 teaspoon dried oregano
- ½ teaspoon dried basil
- Salt and black pepper, to taste
- A pinch of sugar (to balance acidity)
For the Toppings
- 2 to 3 cups shredded low-moisture mozzarella cheese
- ½ cup grated parmesan (optional, for extra flavor)
- Toppings of choice: pepperoni, mushrooms, bell peppers, onions, olives, or sausage
- Fresh basil leaves, for garnish
Step 1: Make the Dough
Start by activating your yeast. In a large mixing bowl, combine the warm water, sugar, and yeast. Let it sit for about 5 to 10 minutes until it becomes foamy — this tells you the yeast is alive and active. If it doesn’t foam, your yeast may be expired, and it’s worth starting over with a fresh packet.
Once the yeast mixture is foamy, add the flour, salt, and olive oil. Mix everything together with a wooden spoon or stand mixer fitted with a dough hook until a shaggy dough forms. Turn the dough out onto a lightly floured surface and knead for about 8 to 10 minutes, until it becomes smooth and elastic. If you’re using a stand mixer, this will take about 5 to 6 minutes on medium speed.
The dough should be slightly tacky but not sticky. If it’s sticking too much to your hands, add flour a tablespoon at a time. If it feels too dry and stiff, add water a teaspoon at a time.
Step 2: The First Rise
Shape the dough into a ball and place it in a lightly oiled bowl, turning it once to coat all sides. Cover with plastic wrap or a damp kitchen towel and let it rise in a warm spot for about 1 to 1.5 hours, or until it has doubled in size.
This is a good time to make your sauce.
Step 3: Make the Sauce
While the dough rises, heat olive oil in a saucepan over medium heat. Add the minced garlic and cook for about 30 seconds, just until fragrant — be careful not to burn it. Pour in the crushed tomatoes, oregano, basil, salt, pepper, and a pinch of sugar. Let the sauce simmer gently for 15 to 20 minutes, stirring occasionally, until it thickens slightly and the flavors meld together.
Taste and adjust the seasoning as needed. Some people prefer a chunkier, more rustic sauce, while others like it smooth — you can blend it briefly with an immersion blender if you prefer a silkier texture. Set the sauce aside to cool while you prepare the pan.
Step 4: Prepare the Pan
This step is what separates pan pizza from every other style. Generously coat the bottom and sides of a 10 or 12-inch cast iron skillet (or a round cake pan of similar size) with about 3 tablespoons of olive oil. Don’t be shy here — the oil is what creates that signature crispy, fried bottom crust.
Step 5: Shape the Dough in the Pan
Once the dough has doubled, punch it down gently to release the air. Transfer it to the oiled pan and begin pressing it out with your fingertips, working from the center outward. Push the dough all the way to the edges of the pan, and even slightly up the sides if you like a thicker crust rim.
If the dough resists and springs back, don’t force it — let it rest for 10 minutes and then continue stretching. This relaxation period allows the gluten to loosen up, making it much easier to work with.
Step 6: The Second Rise
Cover the pan loosely with plastic wrap or a towel and let the dough rise again for 30 to 45 minutes. It should puff up slightly and look pillowy. This second rise is key to achieving that light, airy interior that pan pizza is known for.
While it rises, preheat your oven to 475°F (245°C). If you have a pizza stone or steel, place it on the middle rack to preheat as well — it will help maintain even heat, although it’s not strictly necessary for pan pizza.
Step 7: Assemble the Pizza
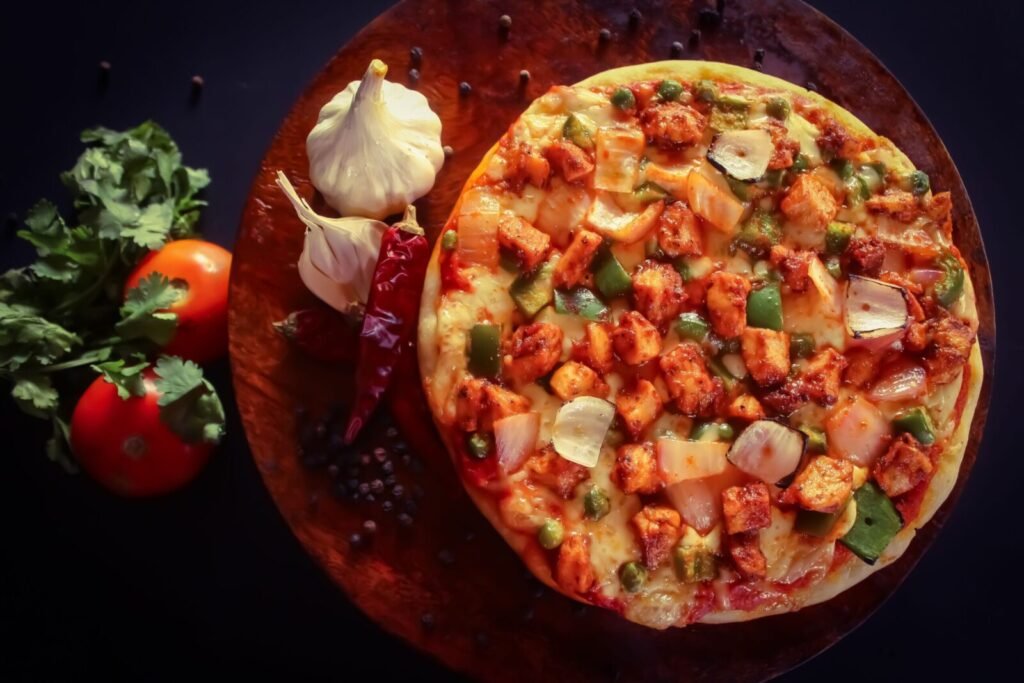
Once the dough has finished its second rise, it’s time to build your pizza. Spread the sauce evenly over the dough, leaving a small border around the edges. Sprinkle the mozzarella cheese generously across the entire surface, making sure to get some right up to the edges — this is what creates that irresistible crispy cheese rim when it caramelizes against the hot pan.
Add your toppings of choice. If you’re using raw ingredients like mushrooms, onions, or bell peppers, consider giving them a quick sauté beforehand to release excess moisture, which helps prevent a soggy pizza. Finish with a sprinkle of parmesan for extra depth of flavor.
Step 8: Bake
Place the pan on the lowest rack of your preheated oven for the first 10 minutes — this helps the bottom crust get a strong head start on crisping up. After 10 minutes, move the pan to the middle rack and continue baking for another 10 to 15 minutes, until the cheese is bubbling and golden brown and the crust edges are deeply caramelized.
Total bake time is usually around 20 to 25 minutes, but ovens vary, so keep an eye on it toward the end.
Step 9: Rest, Slice, and Serve
Once out of the oven, resist the urge to slice immediately. Let the pizza rest in the pan for 5 minutes. This allows the cheese to set slightly and makes for cleaner slices. Use a spatula to carefully lift the edge and check that the bottom is golden and crisp before removing it from the pan.
Slice into squares (the classic pan pizza style) and garnish with fresh basil leaves. Serve hot.
Tips for the Best Pan Pizza
- Don’t skimp on the oil. It’s the secret to that crispy, almost-fried crust that makes pan pizza so special.
- Use room-temperature dough. Cold dough is harder to stretch and more likely to spring back.
- Let the dough rest if it fights you. Gluten relaxation makes shaping so much easier.
- Don’t overload with toppings. Too many wet ingredients can make the pizza soggy in the middle.
- Invest in a cast iron skillet. It retains and distributes heat far better than a regular baking pan, giving you a more even, crispy crust.
Common Variations to Try
Once you’ve mastered the basic recipe, there’s plenty of room to experiment:
- Detroit-style pan pizza: Use a rectangular pan, layer brick cheese all the way to the edges, and add sauce on top after baking instead of underneath.
- Chicago-inspired deep dish: Increase the dough thickness and layer cheese first, then toppings, then sauce on top.
- White pan pizza: Skip the tomato sauce entirely and use a garlic olive oil base with ricotta, mozzarella, and fresh herbs.
- Spicy pan pizza: Add chili flakes to the sauce and finish with hot honey after baking for a sweet-spicy kick.
Final Thoughts
Pan pizza proves that you don’t need fancy equipment or professional training to make incredible pizza at home. With a simple dough, a flavorful sauce, and the right pan technique, you can create a pizza with a crispy, golden crust and a soft, chewy interior that rivals anything from your favorite pizzeria. The next time you’re craving pizza night, skip the delivery app and reach for your cast iron skillet instead — your taste buds will thank you.