

There are few street foods in South Asia that spark as much joy — and as much debate — as golgappay. Known by different names depending on where you are, whether it’s golgappay in Pakistan and parts of North India, pani puri in Mumbai, puchka in Kolkata, or gup chup in parts of Odisha, this snack has one job: to deliver a burst of crispy, tangy, spicy, and slightly sweet flavor all in a single bite. It’s the kind of food that turns strangers standing around a street cart into instant friends, all waiting their turn for “just one more.”
For anyone who’s ever stood at a golgappay stall and wondered how the vendor manages to fill each hollow puri so quickly without it collapsing, or how that tangy water gets its distinct flavor, this guide breaks the whole process down so you can recreate it in your own kitchen. It takes a little practice to get the assembly right, but once you do, you’ll never look at store-bought puris the same way again.
What Exactly Is Golgappay?
At its core, golgappay consists of three main components: the puri itself, which is a small, hollow, deep-fried shell made from semolina or wheat flour; a spiced, tangy water known as pani; and a filling, usually made from mashed potatoes, chickpeas, and a mix of spices. The magic happens when all three come together in one bite — you crack a small hole in the puri, stuff it with the filling, dunk it into the tangy water, and pop the whole thing into your mouth before it has a chance to fall apart.
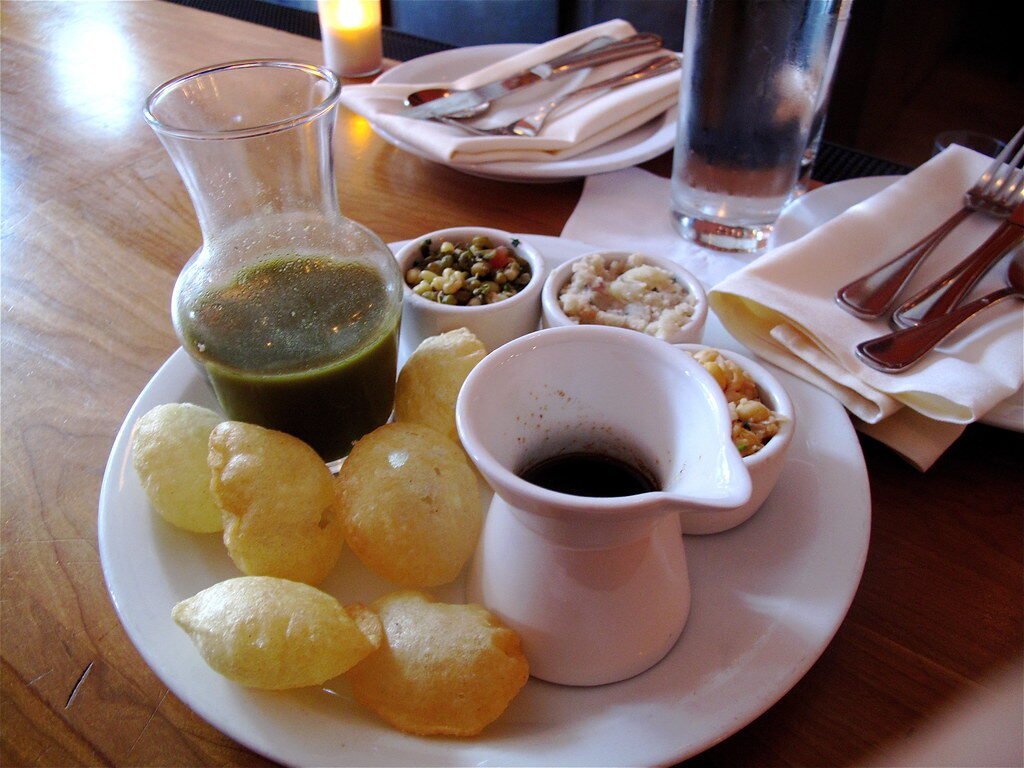
The name itself varies across regions, but the concept remains largely the same everywhere it’s found. What does change from region to region is the specific flavor profile of the pani, with some versions leaning more toward mint and coriander, others favoring tamarind and jaggery for a sweeter edge, and some incorporating a fiery, chili-forward kick.
Why Making Golgappay at Home Is Worth It
It might seem easier to just buy premade puri shells from a store, and honestly, that’s a completely valid shortcut if you’re short on time. But making the puris from scratch gives you a noticeably crispier, fresher shell, and there’s something deeply satisfying about watching each little dough ball puff up into a perfect hollow sphere in hot oil. Beyond that, making everything from scratch lets you control the spice level and tanginess of the pani exactly to your taste, which is often the biggest point of contention between different regional and family recipes.
Ingredients You’ll Need
This recipe makes about 30 to 35 puris, enough for a solid snack session for 4 to 5 people.
For the puri (shells):
- 1 cup fine semolina (sooji/rava)
- 2 tablespoons all-purpose flour
- ¼ teaspoon baking soda
- Water, as needed, to form a stiff dough
- Oil, for deep frying
For the pani (tangy spiced water):
- 1 cup fresh mint leaves
- ½ cup fresh coriander leaves
- 2 to 3 green chilies, adjusted to taste
- 1-inch piece of ginger
- 2 tablespoons tamarind pulp
- 1 tablespoon jaggery or sugar
- 1 teaspoon roasted cumin powder
- ½ teaspoon black salt (kala namak)
- ½ teaspoon chaat masala
- Salt, to taste
- 4 cups cold water
For the filling:
- 2 medium potatoes, boiled and mashed into small chunks
- ½ cup boiled white chickpeas (safed chana)
- ½ teaspoon roasted cumin powder
- ½ teaspoon chaat masala
- ¼ teaspoon red chili powder
- Salt, to taste
- Fresh coriander, finely chopped
Optional toppings:
- Sweet tamarind chutney
- Fine sev (crunchy chickpea noodles)
- Extra chopped coriander
Step-by-Step Instructions
Step 1: Make the Puri Dough
In a mixing bowl, combine the semolina, all-purpose flour, and baking soda. Gradually add water, a little at a time, kneading until you form a stiff, smooth dough — noticeably firmer than a regular roti dough. This stiffness matters, because a softer dough won’t puff up properly and will end up chewy instead of crisp.
Cover the dough with a damp cloth and let it rest for at least 20 to 30 minutes. This resting period allows the semolina to absorb moisture fully, which is essential for getting that satisfying crunch once fried.
Step 2: Roll and Cut the Puris
After resting, knead the dough again briefly, then divide it into small portions. Roll each portion out into a thin sheet, aiming for a thickness similar to a thin cracker. Using a small round cutter or the rim of a small glass, cut out circles about 2 inches in diameter.
The key here is rolling the dough thin and even. Puris that are too thick won’t puff up properly, and uneven rolling will cause some puris to puff while others stay flat and dense.
Step 3: Fry the Puris
Heat oil in a deep pan or kadhai over medium-high heat. To test if the oil is ready, drop a small piece of dough into it — it should rise to the surface within a few seconds and start sizzling steadily.
Carefully slide a few puris into the hot oil at a time, without overcrowding the pan. As soon as they hit the oil, gently press down on them with the back of a slotted spoon in a circular motion. This encourages steam to build up inside the dough, which is exactly what makes them puff into hollow little balls.
Fry until golden brown and crisp, flipping occasionally for even color, about 1 to 2 minutes per batch. Remove with a slotted spoon and drain on paper towels. Let them cool completely before storing, since any residual warmth will create steam inside an airtight container and soften the crispness you worked so hard to achieve.
If a lot of your puris aren’t puffing up, it usually comes down to one of two issues: the dough wasn’t rolled thin enough, or the oil wasn’t hot enough when they went in. Both are easy fixes for the next batch.
Step 4: Prepare the Pani
While the puris cool, move on to the tangy water. In a blender, combine the mint leaves, coriander leaves, green chilies, and ginger with a splash of water, and blend into a smooth, vibrant green paste.
Transfer this paste into a large bowl or pitcher. Add the tamarind pulp, jaggery or sugar, roasted cumin powder, black salt, chaat masala, and regular salt. Whisk everything together until fully combined, then add the cold water and stir well.
Taste and adjust as needed — the pani should hit a balance of tangy, slightly sweet, and spicy all at once, with a distinct minty freshness underneath. Refrigerate the pani for at least an hour before serving; it tastes noticeably better cold, and the chill helps mellow out any harshness from the raw chilies and ginger.
Step 5: Make the Filling
In a bowl, combine the mashed potatoes and boiled chickpeas. Add the roasted cumin powder, chaat masala, red chili powder, salt, and freshly chopped coriander. Mix everything together gently, keeping some texture rather than mashing it into a completely smooth paste — a little chunkiness makes for a more satisfying bite.
Step 6: Assemble and Serve
This is the fun part, and ideally, it should happen right before eating rather than too far in advance, since assembled golgappay go soft quickly once the pani is added.
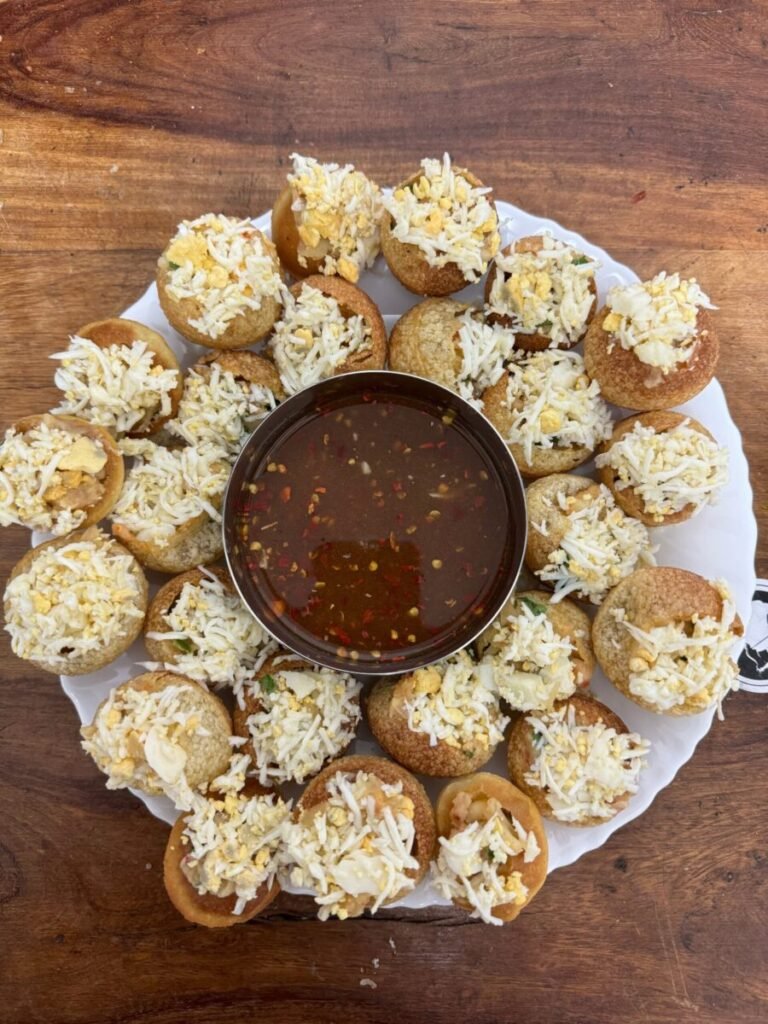
Gently tap a small hole into the top of each puri using your thumb or a small spoon. Spoon in a small amount of the potato-chickpea filling, followed by a touch of sweet tamarind chutney if using. Dunk the filled puri into the chilled pani, making sure it fills up inside, and pop the whole thing into your mouth immediately.
Tips for Getting It Right
- Roll the dough evenly and thin. Thickness inconsistencies are the number one reason puris fail to puff properly.
- Don’t skip the resting time for the dough. It genuinely affects the final texture, giving you a crisper shell.
- Keep your oil at a steady medium-high heat. Oil that’s too hot will brown the puris before they have a chance to puff, while oil that’s too cool will leave them greasy and flat.
- Serve the pani cold. Room temperature pani tastes noticeably flatter and less refreshing.
- Assemble right before eating. Golgappay are meant to be eaten immediately after filling — they lose their signature crunch within minutes once the pani goes in.
- Store puris properly if making ahead. Cooled, completely dry puris can be stored in an airtight container at room temperature for up to a week, making them a great make-ahead component even if you prepare the pani and filling fresh on serving day.
A Few Regional Variations Worth Trying
Depending on where you’re drawing inspiration from, you can adjust the flavor profile of your pani and filling:
- Kolkata-style puchka often uses a spicier, more tamarind-forward pani with a mashed potato filling seasoned simply with mustard oil and spices, giving it a distinct pungent kick.
- Mumbai-style pani puri frequently includes both a spicy green pani and a separate sweet tamarind version, letting people choose or mix the two.
- Delhi and North Indian golgappay tend to lean heavily into the tangy, mint-and-coriander flavor profile, often served alongside a small cup of extra pani on the side for refilling.
Final Thoughts
Golgappay might look like a small, simple snack, but there’s real technique behind getting every component right — from the perfectly puffed, crisp shell to the ice-cold, perfectly balanced pani. Making it at home takes a bit of patience, especially with the frying, but the payoff is a snack that tastes every bit as good, if not better, than what you’d get from your favorite street cart.
Gather a few friends or family members, set up an assembly station, and let everyone build their own — golgappay has always been more fun as a shared, slightly chaotic experience than a neatly plated dish anyway.
Enjoy every crunchy, tangy bite.